Filled indentations, holes, and pit holes with flox and micro balloon resin mix.
Mark's RV-8 Build Log (N184MR)
In October of 2011, I purchased a Vans RV-8 "QuickBuild" experimental aircraft kit. This blog serves as my builders log and captures the major portions of the build process.
Tuesday, February 20, 2018
Monday, February 19, 2018
Canopy Skirt
As anticipated, the canopy skirt has taken a significant number of hours to complete. Trying to get this phase completed during the winter months hampered our progress. Epoxy resin's don't do well in sub-freezing temperatures.
We started with the VANS stock molded piece of fiberglass. The U shaped part that's shipped from the factory needed to be highly customized in order to properly fit the fuselage and canopy. This involved splitting the part in two and re-fabricating a large portion of the rear section.
We started with the VANS stock molded piece of fiberglass. The U shaped part that's shipped from the factory needed to be highly customized in order to properly fit the fuselage and canopy. This involved splitting the part in two and re-fabricating a large portion of the rear section.
 |
| Nylon tape was applied as a release film on the aircraft fuselage skin and canopy. Multiple layers of glass were applied to the upper surface of the canopy skirt. |
 |
| The two skirt halves were joined by reinforcing the back with pieces of insulating foam. Fiberglass wet layup was applied over the foam pieces. |
 |
| Rough finish after the wet layup joining of the two skirt halves. |
 |
| Skirt joined and ready for finishing fills and LOTS of sanding. |
Sunday, June 5, 2016
Instrument Panels ~ Final Finishing
 |
| Back side of cured part for side panels. |
Vacuum bagging of the instrument side panel material was a success however the part compressed more than we thought it would so we didn't achieve the desired thickness necessary to surface match to the center panel. That's ok. A small lip down from the center panel to the side panels still works. One would think 8 layers of cloth would make for a thick part. Eight hours of -28InHg vacuum really bleeds all excess resin resulting in a very nice 50:50 fabric to resin ratio for the part.


Left and right side panels were cut to exactly match the aluminum back plate. This required a lot of careful cut, fit, sand, repeat. The holes for the AOA, ELT, and side vents will be cut after clear coating.
 |

Center and side panels were scuff and cleaned. Wax & Grease remover was used as a final cleaner to ensure that all contaminants were removed prior to painting.
Master painter, John Branchaw, carefully applied four layers of clear coat to each panel.
 |
| Finished carbon fiber panel. |
Next step, mount the avionics trays and install the avionics.
Wednesday, June 1, 2016
Instrument Side Panels - vacuum bagging
Finish sanded layer of SuperFill that was applied to panel mold. Waxed mold and misted a few coats of mold release.
Our goal is to surface match the side panels to the center panel. This requires a material buildup to equal the thickness of the center aluminum piece plus the carbon fiber overlay. A quick calculation determined that we would need six layers of fiberglass plus two layers of carbon fiber. A 50:50 resin to fabric ratio requires 128g of resin. That's a lot!
Eight hours later... Removing the bagging material and bleeder-breather layers revealed a very tacky part that had clearly not yet finished curing under room temperature and good vacuum.
We'll leave the part exposed to a strong morning sun for a few hours to finish the cure process.
Tuesday, May 31, 2016
Wing tip - inside plug fabrication
Used 88g of liquid urethane expanding foam poured onto release play lining wingtip inside surface. The 15x expansion created a good size plug. Next step, fiberglass wet layup using the plug to press the glass to the wingtip surface. We may even vacuum bag the plug to the surface so as to minimize epoxy weight and maximize adhesion.
 |
| Fabricated wing tip mold plug. |
Instrument Panel - composite sides
Sanded mold for side panel pieces. Applied a layer of SuperFill. Will be ready to sand and start vacuum bagging this evening.
Tuesday, January 12, 2016
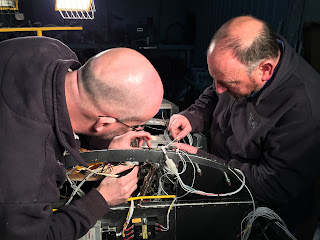
Avionics wire cleanup
Subscribe to:
Comments (Atom)


